
documentation


The purpose of this application is to demonstrate the step by step integration of the VisionLib SDK into your iOS Objective-C application. A simple test model everybody has at hand is any credit card sized card. We will create an application based on Xcode's Game template. It will be successively extended until we have a fully functional AR application augmenting a model over your credit card.
Make sure you have downloaded the latest version of the vlSDK for Apple. You can find the following file structure inside the provided ZIP file.
iOSFrameworksvlSDK.framework - The VisionLib SDK framework for iOSExamplesvlSDK_simpleSceneKitExample - A simple example for iOSMacOSFrameworksvlSDK.framework - The VisionLib SDK framework for macOSembeddedvlSDK.framework - The embedded version of the frameworkExamplesvlSDK_simpleSceneKitExample - A simple example for macOStracker - A global folder containing some example trackerlicense - A convenient folder for placing the license intoWindows Not in focus right now......You can also skip the following sections and just open the example project in Xcode. Note that you may miss the essential parts between the lines.
If you want to start right-away, please copy your license.xml into the license folder. You'll always need a valid license file in order to start the SDK.
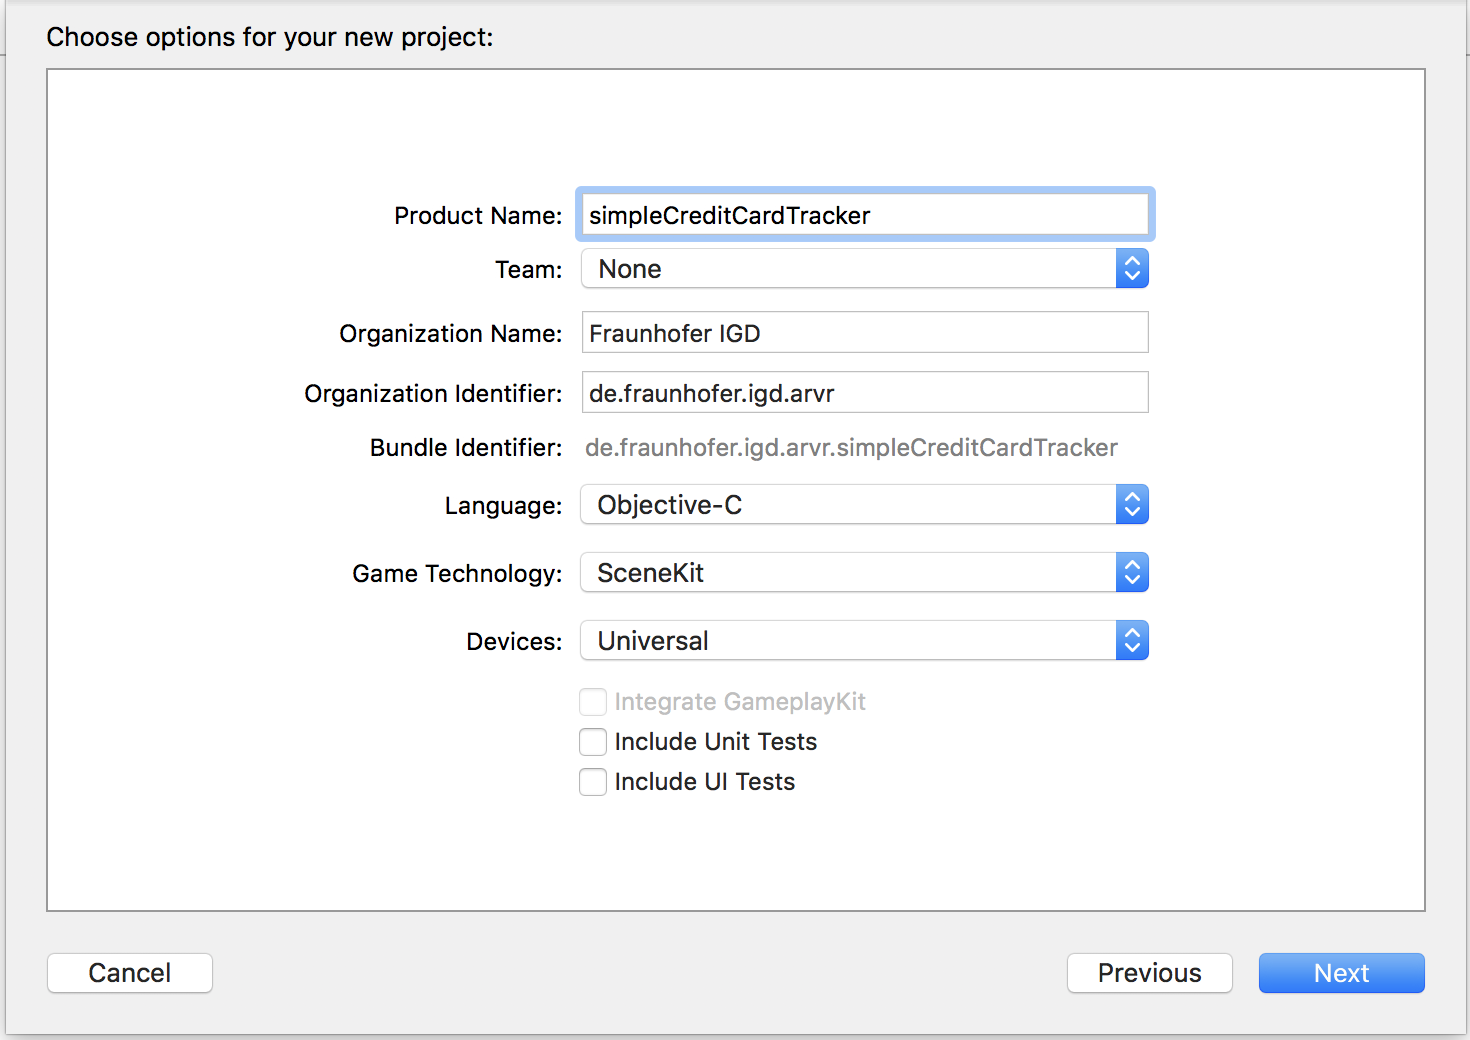
Start Xcode and create a new project of the Game type using iOS.

After that, give the project a name. In this example we named it simpleCreditCardTracker.
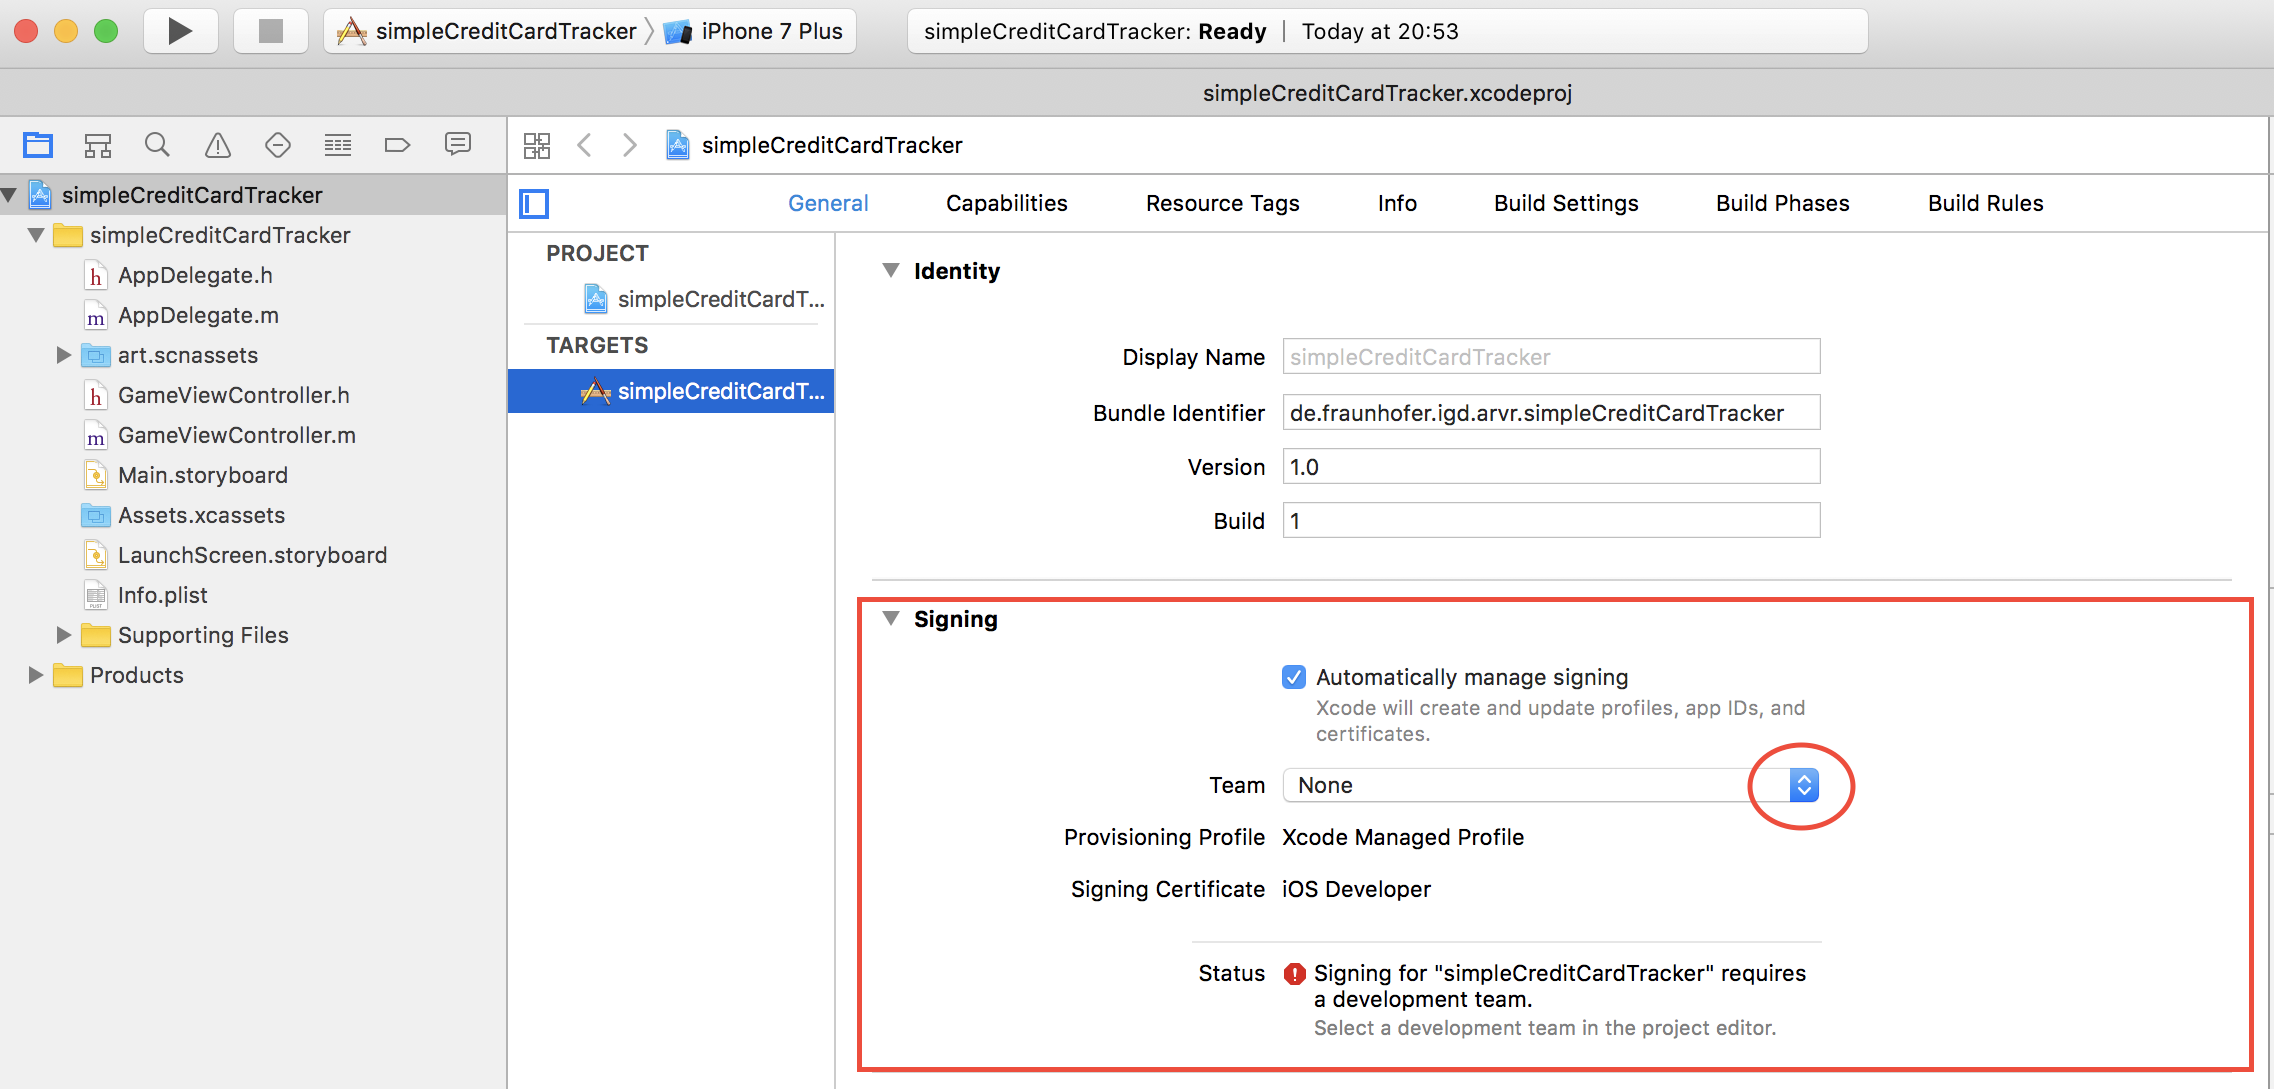
The project overview will open up. In order to test your simple application, you need to sign the application with your Apple developer team.
Now drop the vlSDK.framework file into your project and add the other following frameworks using the + key in the project settings.
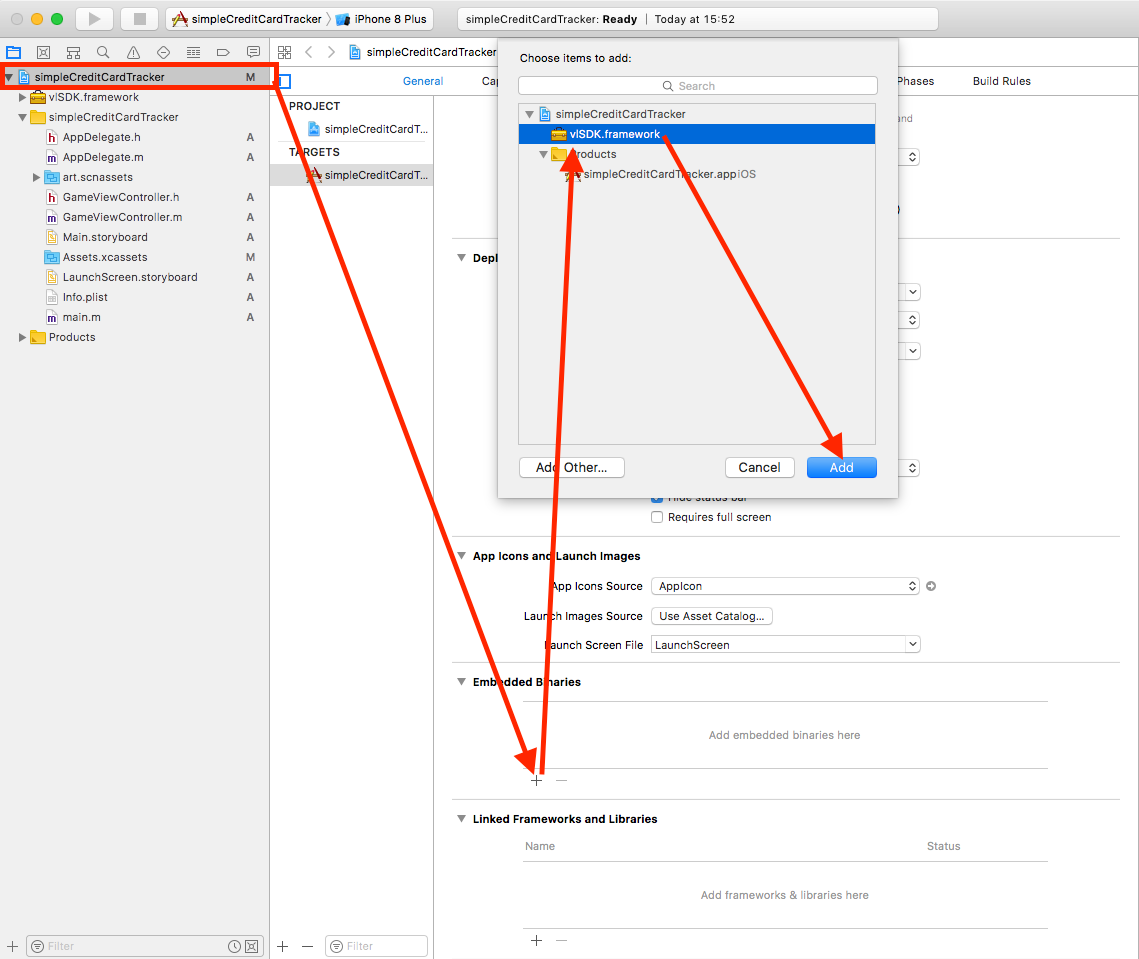
If you have NO C++ code in your application right now, make sure to add libc++.tbd as a linker dependency too. Additionally, you need to set the path to the location where the linker should search the framework later on.
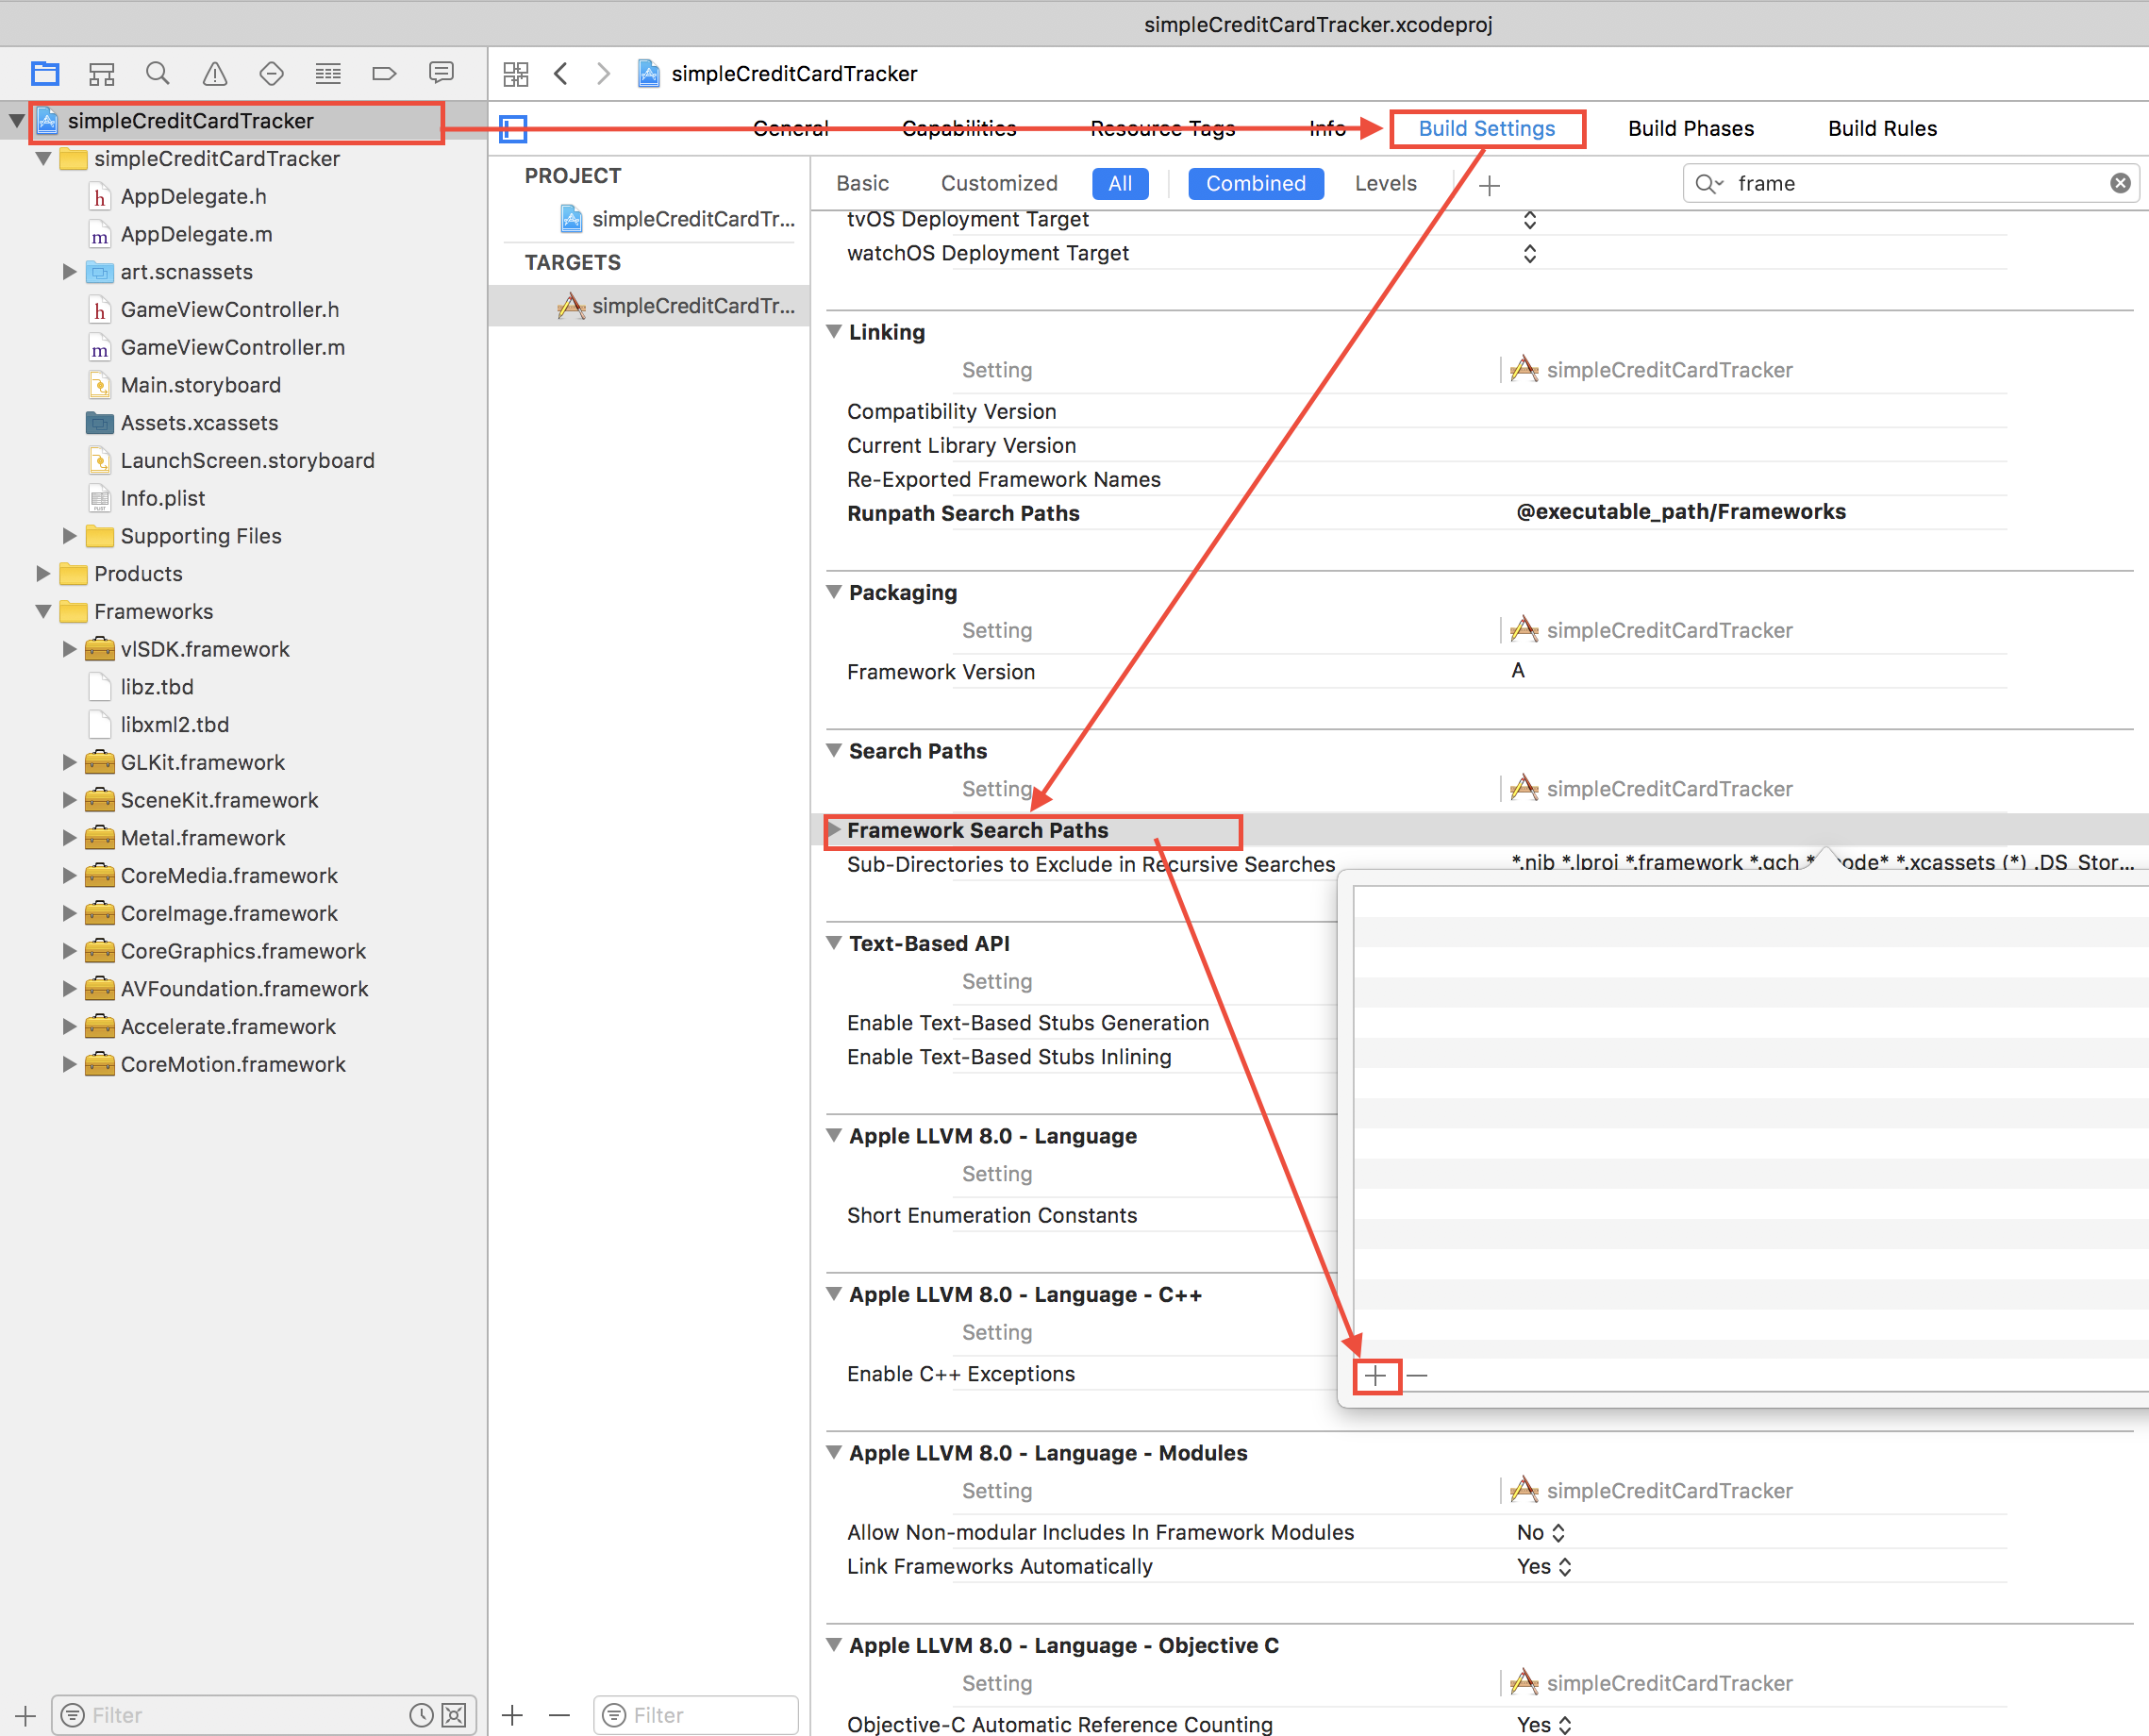
You can add it using the following path: "$(SRCROOT)/../../Frameworks". In this case the Xcode project lies at MacOS/Examples/simpleCreditCardTracker
You should also change the following settings in the same panel:
Now you should already be able to compile your application and start it, which will present you a rotating space ship. We will add some AR in the next steps, connecting this ship to your credit card.
There are three example tracking configurations in the tracker folder of the example path:
You can also create your own tracking configuration using our tracking configurator, or just by using a simple text editor.
For our example, just add the folder "Credit Card Tracker" to the project.
You also need to add the license folder for the vlSDK to work.
The file configuration of your project view in Xcode should now look similar to this.
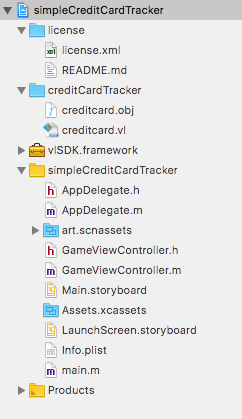
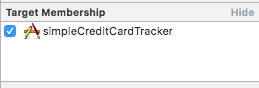
Be sure that you have tagged the Target Membership flags for both folders (license and tracker), so they will be included as resources in the resulting app.
Open the main file GameViewController.h and add the following three lines:
Import the SDK and add a delegate interface to receive notifications from the renderer and the VisionLib SDK delegate interface.
Now switch to the GameViewController.m implementation and add the vlSDK variable:
At the end of the viewDidLoad function add the following snippet:
We create an URI that will allow the SDK to access your tracker. In this case it is a file URI that allows access to your creditCardTracker, which resides in your resources as well. NOTE: Here we use a URI which has a file://` as prefix to your path on iOS.
We now initialize the VisionLibSDK variable by passing the uri of the configuration file, the uri of the license file and setting this controller as a delegate to receive relevant data from the VisionLib.
As we do not want to deal with matrix multiplications and inversions right now, we tell the VisionLib to pass preinverted matrices, which is working nicely with the SceneKit implementation.
We also tell the VisionLib to run. This creates a thread for your application and starts tracking. Anyway, we need to register some methods of SCNSceneRendererDelegate to synchronize the display of our image with the renderer. Therefore we add the following methods to GameViewController.m:
We want to get the image and display it in the background. We achieve this by simply implementing the delegate callback like this:
As a more generic approach (which also works on macOS) you might preferr this code which cannot coexist with the onMetalImageTexture variant.
The first line displays the current scene and the second line sets the texture for the background. The third line actually applies some transformation on your image. This is required if you support device rotation.
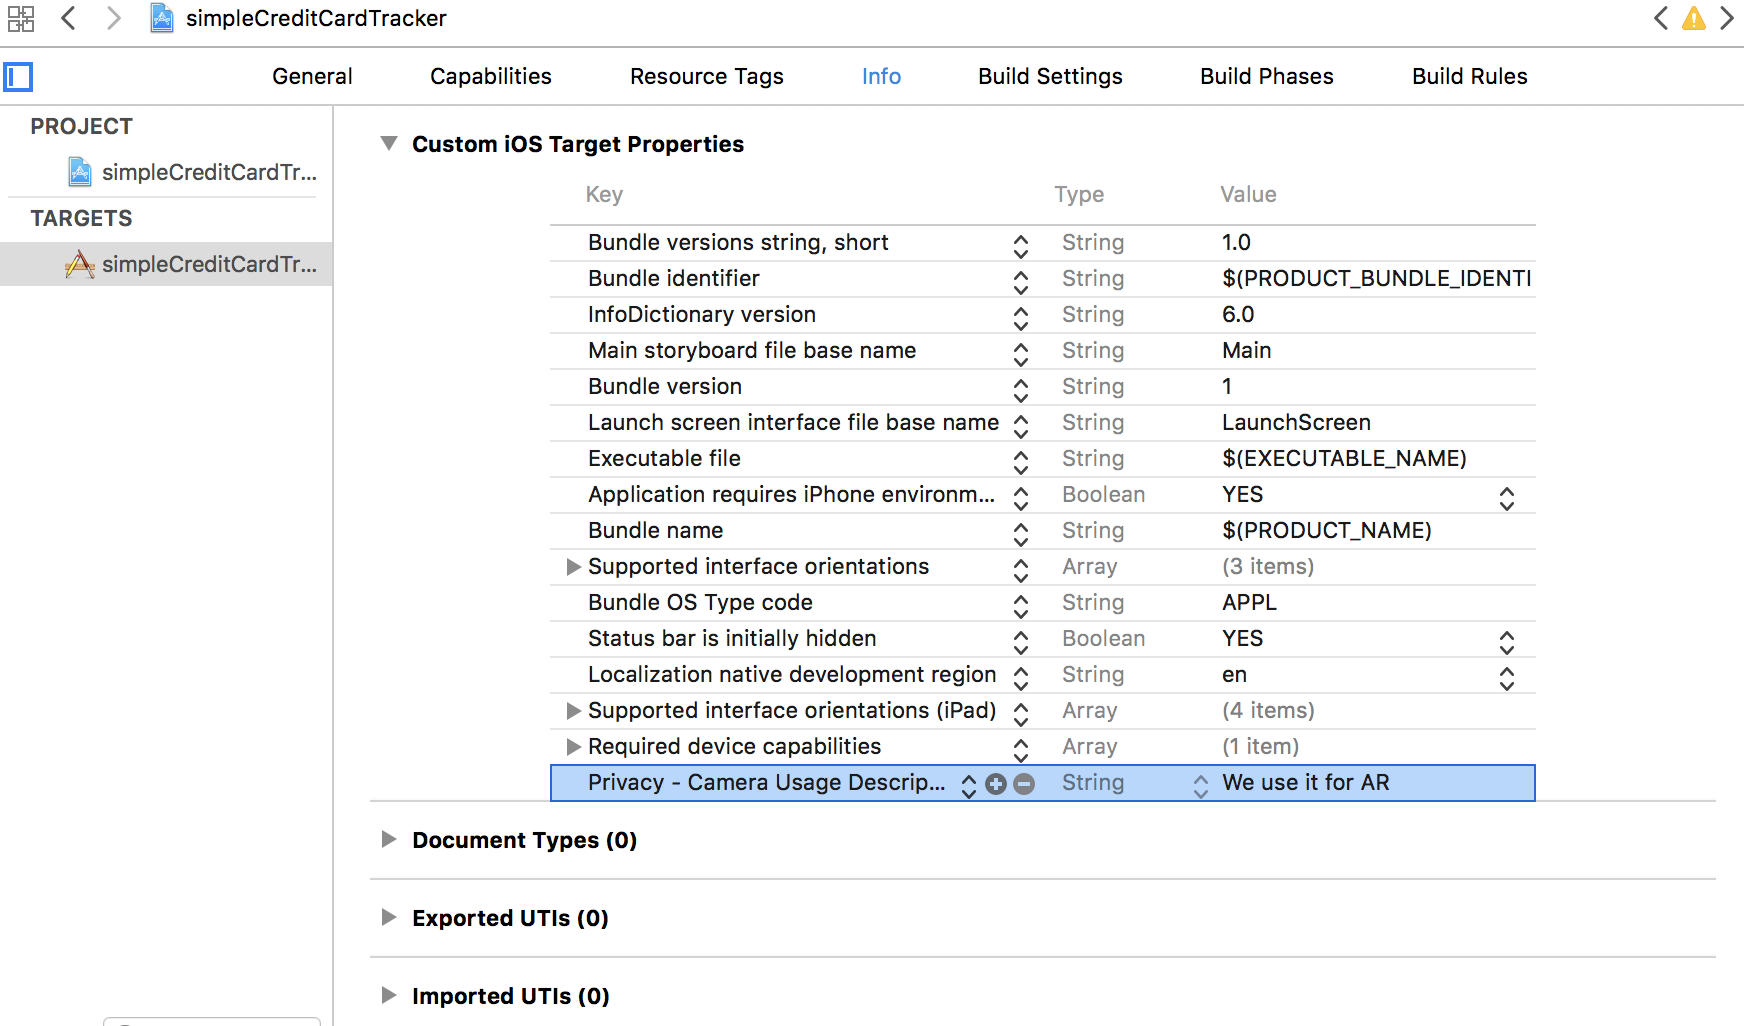
Before we can start the app, you need to set the NSCameraUsageDescriptionin the Info settings of the application. You can set a user notification about the camera usage here.
You will now be able to start the application and run it on your iOS device.
If everything worked fine, you can see the camera image along with the license watermark.
NOTE: If you are using a trial license, the number of tracking starts per deployment is limited to five times. After that, you have to redeploy and restart the application.
Before adding some listeners to reflect the cameras position, you first need to understand the method of model tracking. In the current application state, you'll need an initial pose for your credit card, that guides the user on how to align the virtual with the real model.
Therefore, insert a custom init pose or get the one proposed in the configuration file that we passed on startup. Add the following variables to the GameViewController interface:
Also add a new delegate function to request the initial pose:
Add the following to be able to set the requested init pose:
This saves the provided init pose using the pose that was first passed from the library. You still need to make some changes to the code in Apple's template:
cameraNode to use the globally defined object --> cameraNode = [SCNNode node];creditCardTracker/creditcard.obj instead of the art.scnassets/ship.scn// [ship runAction:[SCNAction repeatActionForever:[SCNAction rotateByX:0 y:2 z:0 duration:1]]];runAction command, trigger the scene animation by enabling scnView.playing = TRUE; in the onViewDidLoad function.Then, the extrinsic (pose) and intrinsic (internal camera parameters) should be applied to the scene.
To set the model view matrix (representing the camera position of your system) and the projection matrix (which represents your internal parameters of your camera system), you need to add two more delegates:
In the onIntrinsicData routine, set the projection transform for the current frame.
In the "onExtrinsicData", you get the pose of the camera as well as a boolean flag, which shows the validity of the pose. If the pose is invalid, the extrinsic data usually represents the last valid pose. If the pose is not recognized, the previously saved initial pose is set to guide the user back to the beginning. Of course, you can also set the old pose as a new init pose, etc.. . Feel free to play around with the available functions.
NOW RUN THE APPLICATION
If everything went fine, your application should work like this: Aligning the virtual credit card model with the real one augments the real model with a rotating space ship.
Congratulations, you just created your first simple iPhone app with VisionLib!