
documentation


For Windows you can find three examples. We provide a CMakeLists.txt which can be used with CMake to generate the solutions to build the examples. Two of the examples require OpenCV to provide a window for displaying the (debug) video stream. The other example just uses std functions but thus does not provide any visualization.
We are using VisualStudio 2019 to build VisionLib. If you want to use an older version of VisualStudio, you might need to install the appropriate Visual Studio redistributables, that you can download directly from Microsoft:
For building the examples, we use CMake and Visual Studio. For the simple example without any visualization there are no additional requirements.
If you want to see the result of the tracking, you also need a version of OpenCV (Core and HighGui). This has been configured with CMake (see step by step tutorial below).
VisionLib.SDK-Native.zip to your development folder.Configure.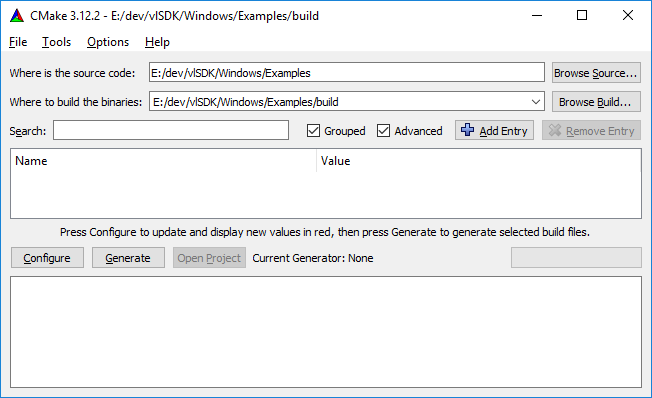
Visual Studio 15 2017 Win64)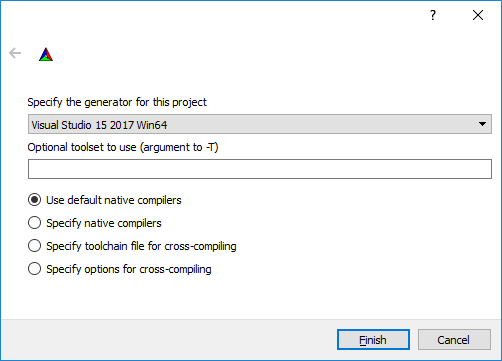
OpenCV_DIR variable in CMake. Set this variable to the build directory that the OpenCV installer created, which contains the OpenCVConfig.cmake file.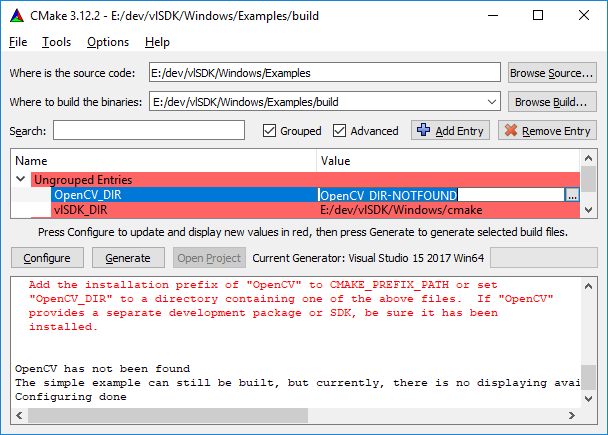
Generate and afterwards press Open Project. In the Solution Explorer, you should see the SimpleModelTracker and (if you configured OpenCV correctly) SimpleModelTrackerOpenCV and SimpleModelTrackerOpenCVSync. Right-click on one of the projects and build it.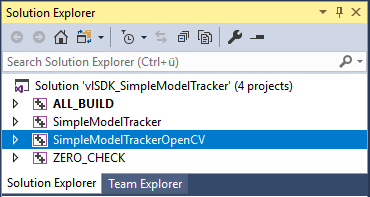
To run the examples, you need to specify the .vl file and your license file as command line parameters. You can specify the Command Arguments in the "Debugging" section of the project properties. The first argument should be the path and name of the .vl file. The second argument should be the path and name of the license file. Both arguments should be separated by one space. Arguments containing spaces should be enclosed in quotes. You can use the tracking configuration Files provided with VisionLib.SDK-Native.zip in the folder vlSDK/trackingConfigurations, e.g. vlSDK/trackingConfigurations/car/car.vl. The SimpleModelTrackerOpenCVSync example requires a vl-file having specific features. Look for the Synchronous example SimpleModelTrackerOpenCVSync section below for more information.

If you build one of the examples with OpenCV and use your own .vl file, it is important, that your tracking configuration contains the parameter
"showLineModel": true
If this is enabled, you can see the camera image containing the line-model of the object to track (line-model in red: tracking is lost, line-model in green: object is tracked, line-model in yellow: tracking is critical). The provided .vl files already contain this parameter.
SimpleModelTrackerOpenCVSyncThe examples SimpleModelTrackerOpenCV and SimpleModelTrackerOpenCVSync provide the same functionality, however they are implemented in a different way. In SimpleModelTrackerOpenCV the vlSDK acquires camera images and then performs model based tracking on them. The application is informed about new tracking results and images using callbacks.
In SimpleModelTrackerOpenCVSync however, camera images are acquired using OpenCV and then injected into the vlSDK, where we then perform the model based tracking in a synchronous function call. In the console window the current ExtrinsicData are written.
For this example you have to use a .vl file that enables the application to inject images. An example of such a file can be found in vlSDK/trackingConfigurations/car/carInject.vl. This file can not be used for the other two examples.
Injecting images and therefor executing this example requires a license with the AllowInjectingImage feature.