
documentation


Debugging Augmented- and Mixed Reality projects with VisionLib can include several levels, such as checking errors in the configuration file setup, troubleshooting runtime issues related to scripting, or debugging and tweaking of the tracking results. As such, debugging, troubleshooting and optimization can involve:
For any debugging related to the tracking, make sure to set these parameters in the configuration file:
| Name | Description | Examples |
|---|---|---|
| debugLevel | Parameter to enable debug functionality. Should be declared and set to ´1´ | "debugLevel": 1 |
| showLineModel | Parameter to render and display the Line Model. | "showLineModel": true |
Using debugLevel you're able to access the debug image and display it e.g. inside your Unity project. For details to the debugLevel look it up in the detail reference.
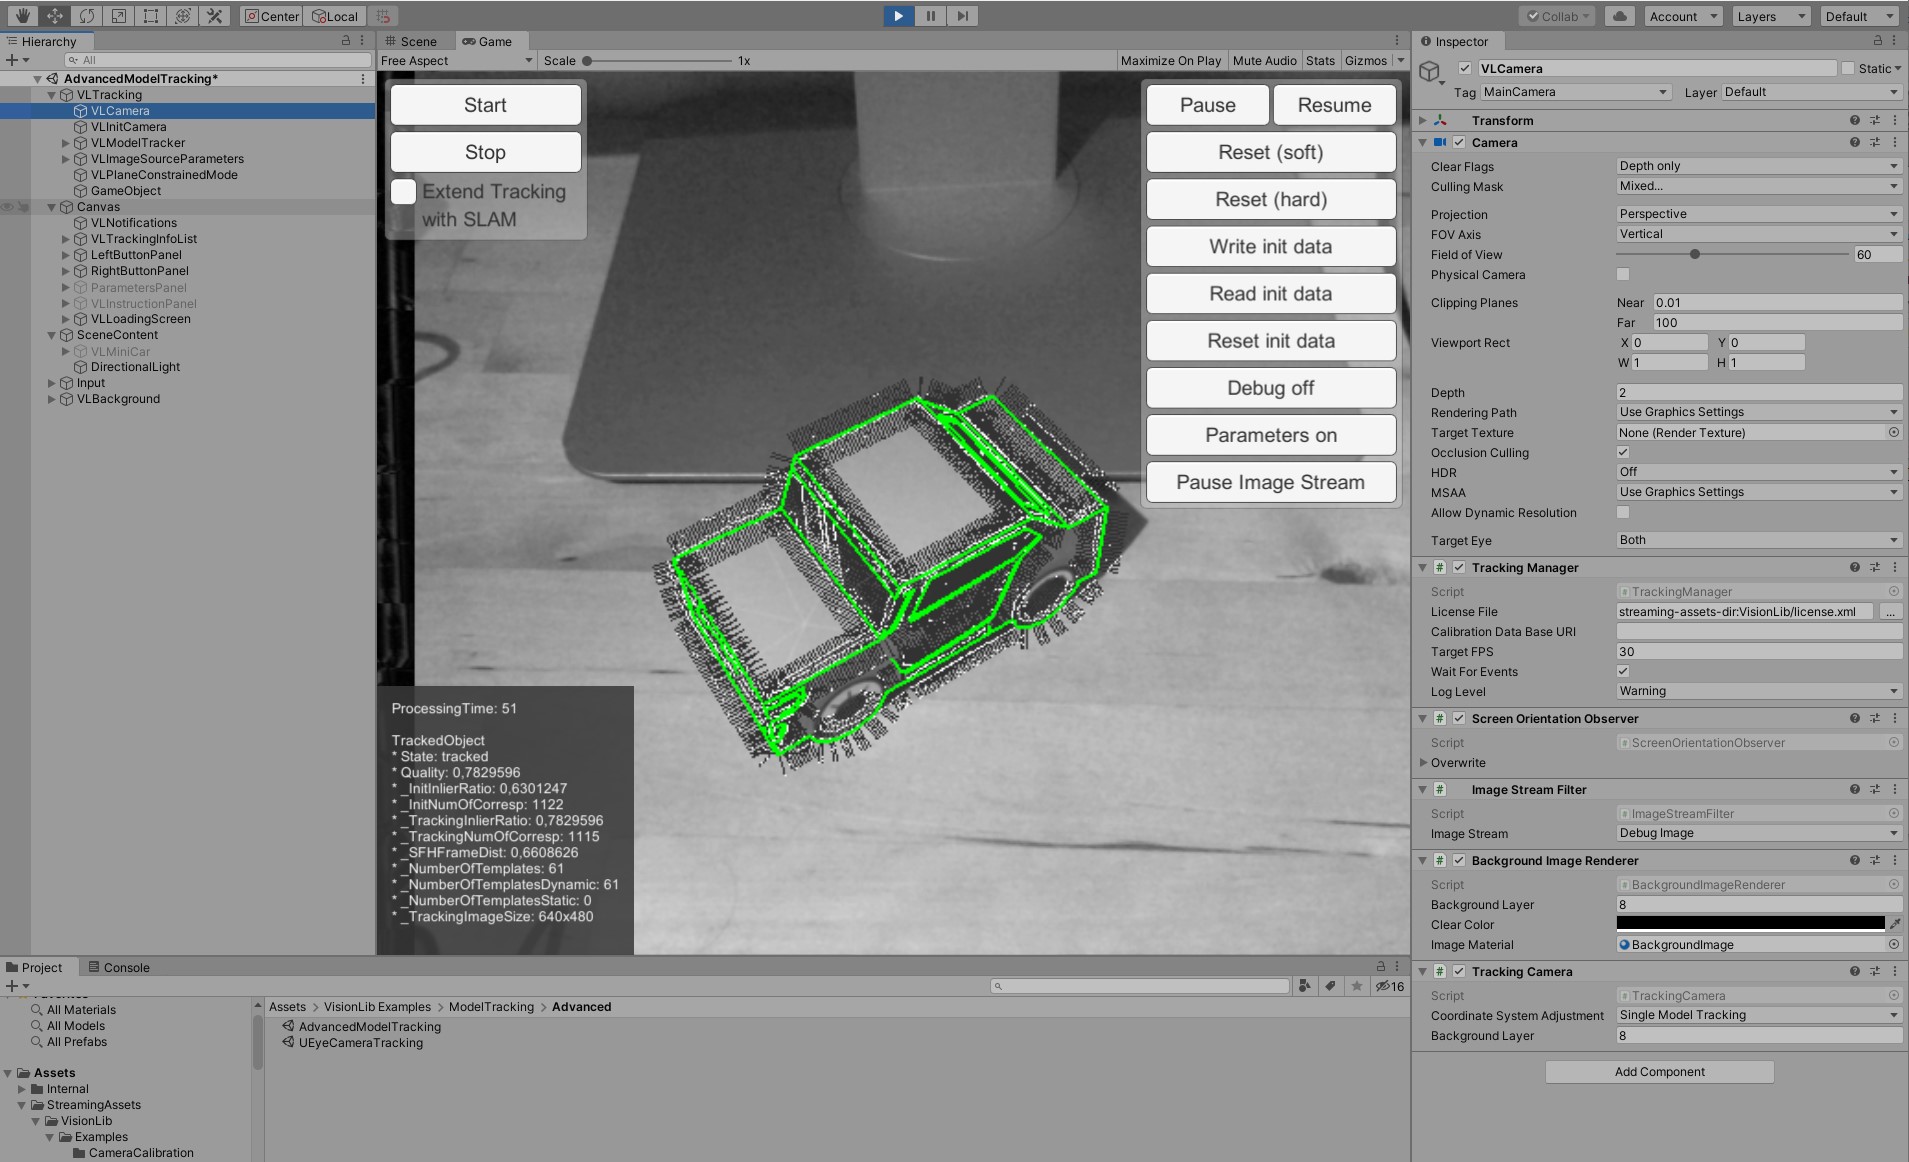
With showLineModel you can control, whether or not VisionLib will render the line model it uses for tracking. Displaying it is very handy, when you use a pre-defined initialization pose (which is the default setup).
The line model will be displayed in different colors according to the current tracking state.
During development, the line model helps to find errors in your tracking setup, e.g. when your Tracking Parameters or the metric you've used in your configuration setup aren't appropriate to track your object.
On a UX level, listening to tracking states is a good practice and increases your app's UX, as you can either trigger custom massages and events that guide your users.
While the line model rendering is primarily designed for debugging purposes, you can also use it as part of your UI and e.g. change the appearance of it, or only show it when tracking is lost &dnash; by using showLineModelLost instead of showLineModel, and you can change the line model's color (there is a brief how-to on this in the tracking states article).
You can explore and test all mentioned options using VisionLib's do-it-yourself tracking target kit. With it, you can create a physical 3D object from paper and download a corresponding 3D model as tracking reference.
When debugging in Unity, we recommend to use the VisionLib's example scenes from the Unity SDK.
VisionLib.SDK-Unity.tgz via the package manager.VisionLib.SDK.Examples-Unity.unitypackage by dragging it into your project view or via Assets > Import Package > Custom Package.ModelTrackingSetup scene and reference your license file in the TrackingConfiguration component on the VLTracking GameObject.debugLevel and showLineModel set in the config file as mentioned earlier).When you load configuration files in Unity, VisionLib will raise issues and give hints, if errors occur. Also, watch the output on the console.
VisionLib notifications are logged to the console by default. They are additionally displayed on the screen, as soon as you put the VLNotifications prefab under your canvas in the hierarchy, like it is the case in our example scenes.
Also have a look at the GeneralSettings component of the VLTracking GameObject. Here, you can adjust the global log level that affects the frequency of the logs and the UI notifications.
The following log levels can be used:
Mute: Don't show any notification.Error: Notify about issues that prevent the application from working correctly.Warning: Notify about sub-optimal behaviour and issues, that could be turned into an error in later versions. This is the default log level.Info: Show significant state changes and selected additional information.Debug: Show detailed information to debug the application.Initialization-related issues are of type Error and Warning, while tracking events are of type Info.
While the default log level is Warning, it can be helpful to temporary increase the log level to Info during development. This will for example display the deviceID of your selected camera, or notifications when the tracker has initialized or stopped.
In case of debugging functionality, the ModelTrackingSetup is the most elaborate one. Here you can either load and test your custom tracking configuration, or as a developer, learn how VisionLib's VL components, scripts and prefabs are connected and used.
For example it contains the VL Tracking Info List prefab, which is activated when pressing the Debug On button. This UI element plots realtime information of the tracking engine, such as the tracking state or quality.
Feel free to add this element to your own scenes as you see fit. Please note, that if you don't want to use VisionLib's notifications in your final, release-ready, application, make sure to disable these debug components, set debugLevel: 0 and remove other development-relevant items before deployment.