
documentation


This tutorial guides you through the deployment of your application to HoloLens.
Please ensure you have installed all required tools and adjusted the settings for HoloLens and Unity Development:
This tutorial assumes you have a valid Unity scene containing VisionLib tracking and a valid VisionLib license.
Some initial adjustments must be made to the Unity project:
File/Build Settings):Add Open Scenes buttonUniversal Windows Platform and press Switch Platform 
Edit/Project Settings/Player):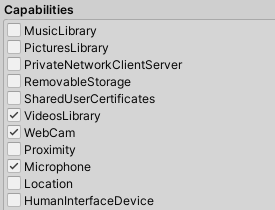
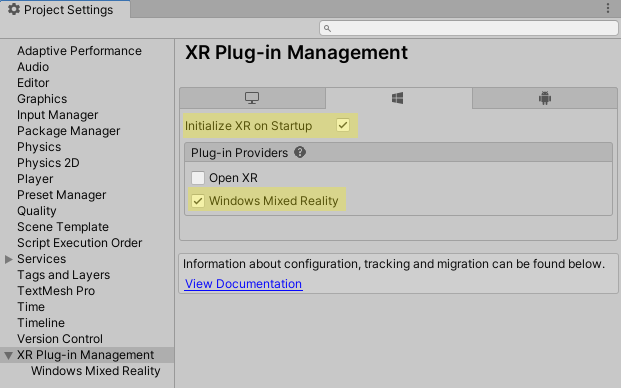
Edit/Project Settings/XR Plugin Management):In the plugin management, you can either use Windows Mixed Reality (until Unity 2020) or OpenXR (Unity 2020 or higher; OpenXR API is not supported for HoloLens (1st gen)).
To use Windows Mixed Reality, select WindowsMR as Plug-in Provider in XR Plug-in Management under ProjectSettings. Make sure Initialize XR on Startup is selected.
To use OpenXR, follow these steps:
MixedRealityFeatureTool.exeStart.Project Path and click Discover Features.Mixed Reality OpenXR Plugin under Platform Support and click GetFeatures. 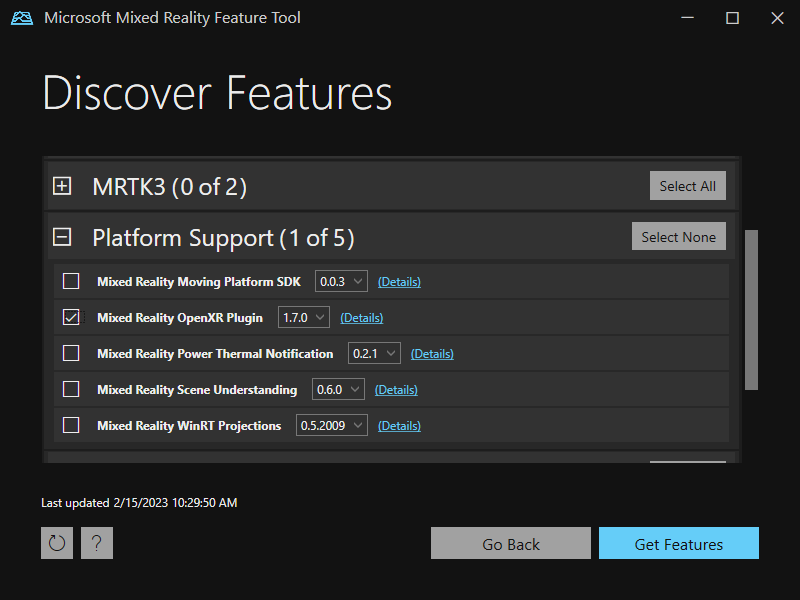
Import and then Approve to include the Mixed Reality Toolkit.Microsoft Mixed Reality Feature Tool by pressing Exit.OpenXR as Plug-in Provider in XR Plug-in Management under ProjectSettings.Initialize XR on Startup is selected.Microsoft HoloLens feature group is selected. 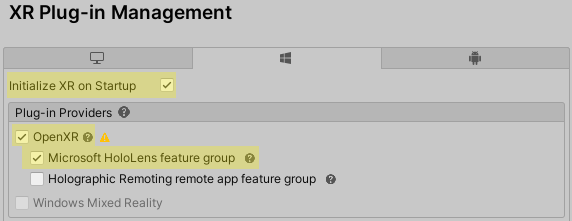
OpenXR checkbox. This opens the OpenXR Project Validation.Fix All button to set up your project for use with OpenXR 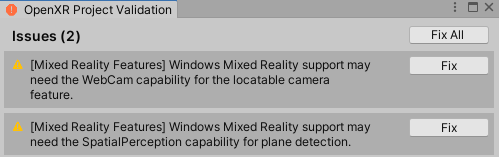
OpenXR subsection:Microsoft HoloLensMicrosoft Hand Interaction Profile as Interaction Profile. 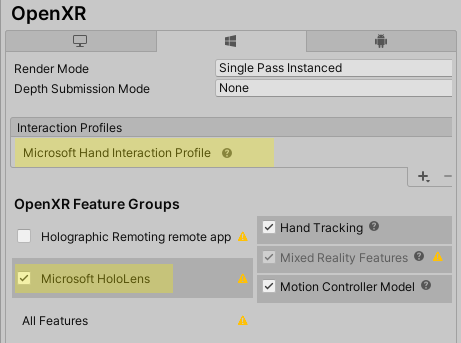
Note: Development iterations can be reduced by starting your scene once in the Unity Editor before deploying. Here, you can already check if your license file is set correctly and if your scene setup is valid. You can not directly test the tracking, though. Starting the play mode should show no camera image, but some canvas elements like the description text. There should not be any error displayed but some warnings, that the scene cannot be executed in the Unity Editor.
If the editor test behaves correctly, build and deploy your application to the HoloLens by following these steps:
Build button in the File/Build Settings window and select a folder for the HoloLens deployment.*.sln) in that folder.Release or Debug and ARM64 (on HoloLens (1st gen) to x86) as shown below.Local Machine to Device (deploy via USB connection) or Remote Machine (deploy via Wi-Fi).Remote Machine, you will be asked to enter the IP address of the HoloLens first. (On HoloLens: Settings/Network & Internet/Hardware Properties/IPv4 address). 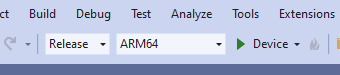
Settings/Update/For developers).Remote Machine or Device to deploy and run the application on the HoloLens.Settings/Update&Security/For developers. 
Once the HoloLens application starts, you will be asked for permission to use the microphone and webcam. These permissions are mandatory for tracking and the use of voice commands. Click Yes to confirm the dialog. Now look at your model to initialize tracking.
Please consider improving initialization and re-initialization speed by using the Read/Write Data commands (see HoloLens Voice and Keyboard Commands). To understand the concept of init data, refer to this article: Initialization: Fast Init & Re-initialization.
Please note that the trial license may only be used for evaluation purposes and does not permit application development.
With a trial license, you can only start an application up to five times after successful deployment. After the fifth deployment, the VisionLib SDK will no longer function in your application. To reset this, you must modify your project and redeploy the application to the device.
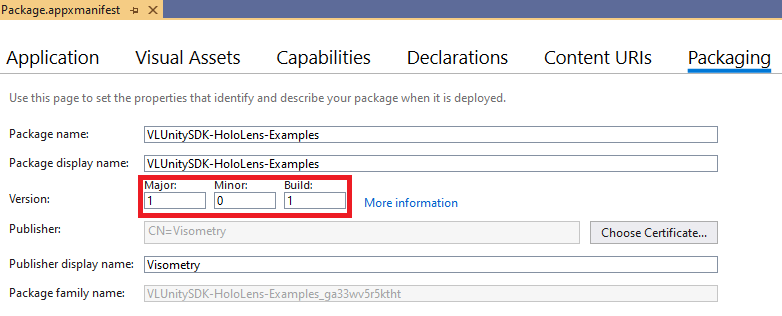
When deploying on HoloLens with Visual Studio, the application might be updated instead of completely reinstalled, which might cause the deployment counter not to be reset correctly. If you still experience license errors, try uninstalling the app on the HoloLens manually before deploying – or update the version in the package.appxmanifest:
This restriction does not apply to other license types. Once you have finished your evaluation of our SDK, you can remove the 5-time restriction by purchasing the appropriate license type for your use case.