documentation


Tracking is often used to augment real objects with additional digital content. This page introduces the RenderedObject component and explains how to use it to create custom augmentations in a scene. We provide an example setup in the DifferentAugmentation scene.
Our Unity SDK uses 3D models for three different purposes (each explained in its own section below):
In most example scenes, we use the same model for all three purposes. The DifferentAugmentation uses different models for the init pose guide and the augmentation.
The tracking geometry comprises the models that are used for tracking. These models must exactly match the physical object you would like to track. See Model Parts Tracking in Unity for more information on the tracking geometry. Instructions for the tracking geometry setup procedure are given in UnitySDK Quick Start.
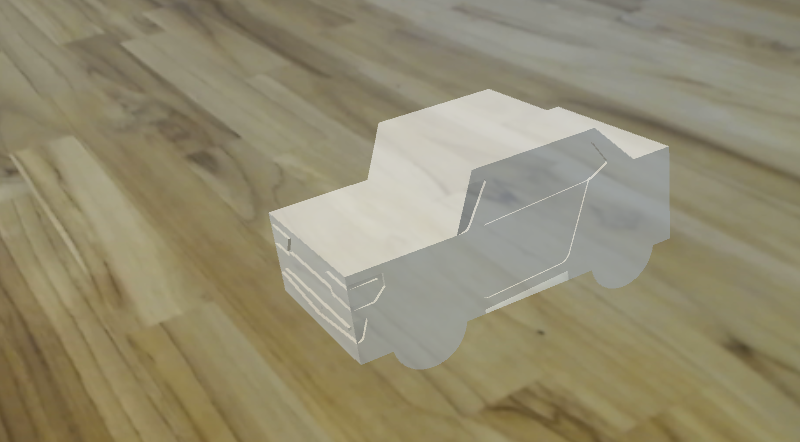
The init pose guide comprises the models that are rendered while VisionLib searches for the physical object in the images.
This model helps the user move the camera to the specified (init) pose at which tracking will start. It is therefore often helpful to use a model that is similar to the tracking geometry (e.g. a simplified version of said tracking geometry). In our example, we use the same model as the tracking geometry and add a semi-transparent shader:
The augmentation comprises the models that are augmented in space relative to the tracked object. In the DifferentAugmentation example, a caravan is augmented behind the car while the car is tracked. The augmentation also contains a copy of the tracking geometry (i.e. the car) to which we applied the VR/SpatialMapping/Occlusion shader. This achieves the appearance of the real car occluding the virtual augmented caravan like so:
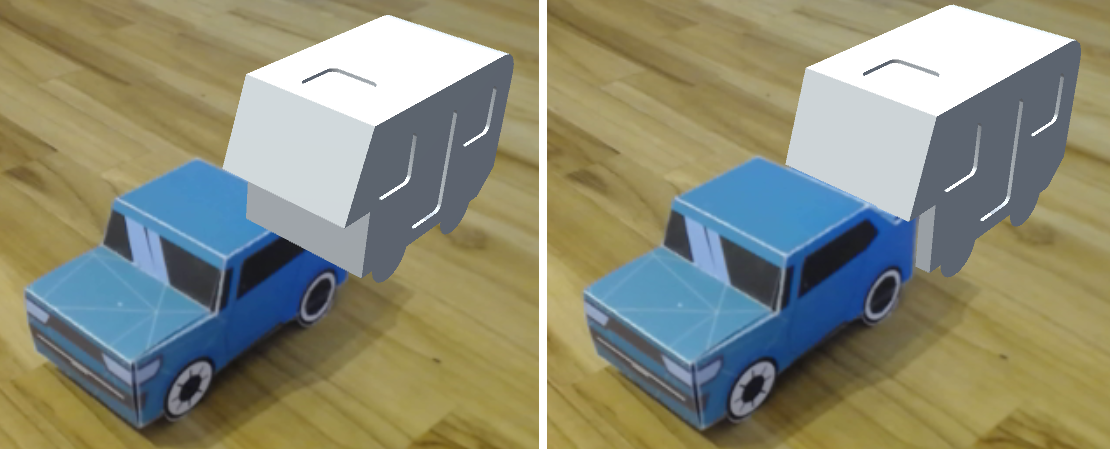
The VR/SpatialMapping/Occlusion does not draw the car but occludes everything behind it.
As mentioned above, it is possible to use a single model for all three purposes. This is the simplest possible augmented content setup. It is commonly used for tracking validation.
This can be set up either by manually adding a RenderedObject component to the same GameObject as the TrackingAnchor or by simply pressing the Use this tracking anchor as content button:
Once set up, this RenderedObject shows in the Augmented Content section of the TrackingAnchor as follows:
In the DifferentAugmentation scene, the Augmented Content comprises two different RenderedObjects. One for the augmentation and one for the init pose guide:
This can be replicated in your own scenes as follows:
TrackingAnchor that has at least one Mesh on its child GameObjectsCreate copy of content as init pose guide and Create copy of content as augmentation:These buttons create GameObjects with plain copies of the tracking geometry and RenderedObjects that are already correctly set up for the purpose. Create copy of content as init pose guide also automatically applies a semi-transparent material to the copied meshes.
The copies can now be customized as desired e.g. by using simplified meshes, different materials, etc.
The RenderedObject is the key component that connects the augmented content meshes to a TrackingAnchor.
The RenderedObject component registers itself with the referenced TrackingAnchor. It applies the tracking results (poses) from the connected TrackingAnchor to the augmented content and also manages the content's visibility according to the anchor's tracking state. It is therefore essential that the correct TrackingAnchor is referenced here. This is done automatically when a RenderedObject is created by the TrackingAnchor via the buttons introduced above.
RenderedObjects offer the four different visibility modes listed below.
NOTE: RenderedObjects never enable any Renderers they didn't themselves disable. If a Renderer underneath a RenderedObject was disabled manually or by other code, the RenderedObject will not change its enabled state.
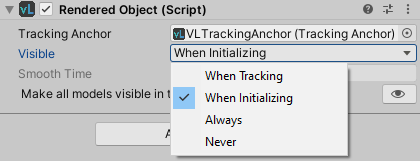
When Tracking (i.e. use as Augmentation):RenderedObject's content is only rendered while the tracking state is Tracked, i.e. while the object is recognized in the camera image. The content is hidden whenever tracking is Lost (all Renderers on child GameObjects are deactivated.)When Initializing (i.e. use as Init Pose Guide):RenderedObject's content is only rendered while the tracking state is Lost, i.e. while the object is not present or recognized in the camera image. The content is hidden whenever the tracking state is Tracked or Critical.Always:RenderedObject's content is always rendered, regardless of the TrackingAnchor's tracking state.Never:RenderedObject's content is never rendered, regardless of the TrackingAnchor's tracking state.Augmented content can visibly jitter during tracking if it is arranged far from the tracking geometry – even if the camera and the tracked object are entirely static. This is caused by slight fluctuations in the tracking pose estimation that are amplified over the distance to the augmented meshes.
RenderedObjects provide a smoothing mechanism that allows you to counteract this effect. If active (value greater than 0), new tracking results are not directly applied to the respective RenderedObject. Instead, the pose to apply is taken from an interpolation between the RenderedObject's previous pose and the new tracking result. This way, small fluctuations in the tracking result don't have an immediate effect on the augmentation and are instead smoothed out.
The Smooth Time controls the extent of the smoothing. High values lead to smoother movement while low values cause more immediate pose updates. In more detail, Smooth Time regulates the selection of the pose to apply from the aforementioned interpolation. Larger values select a pose to apply that is closer to the previous pose, whereas lower values select a pose closer to the new tracking result.
Since the smoothing works in world coordinates (not relative to the camera), it is only active for the augmentation and not the init pose guide. Using smoothing only makes sense if:
Extendible tracking is enabledNote: It can be beneficial to use multiple RenderedObjects with different smooth times for a given TrackingAnchor, depending on their distance from the tracked object. Augmentations that are close to or even located on the object can be updated immediately, while augmentations that are further away may jitter due to leverage effects.
Troubleshooting: Smoothing sometimes causes the augmentation to lag behind the real object even if only the camera is being moved. This is commonly caused by an incorrectly specified tracking model metric. The metric assigned to the model must match the real tracked object dimensions. For details on this, see the "Metric" section in Mandatory Initial Parameters.
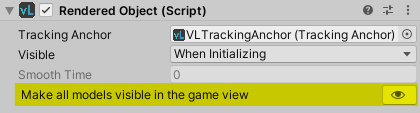
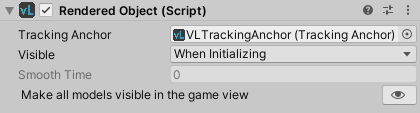
The RenderedObject has a button that toggles the visibility of the model (see screenshot below). Pressing this button activates/deactivates all Renderer components below this GameObject. In contrast to disabling the whole GameObject, this allows you to control visibility without affecting other components' functionality.
E.g., the RenderedObject's pose updates will still work.