
documentation


In this quick guide, we demonstrate how to get started with the VisionLib SDK for Unity. We provide a broad overview on the Unity SDK, the workflow with VisionLib, and the structure of tracking configuration file.
Before you start, be sure to have the following installed or at hand:
VisionLib.SDK-Unity package, downloaded from the customer areaVisionLib.SDK-Unity.tgz via the package manager and add the VisionLib.SDK.Examples-Unity.unitypackage via Assets > Import Package > Custom PackageVisionLib Examples/ModelTracking/Simple in the project navigator and open SimpleModelTracking.unityStreamingAssets/VisionLib folder of your Unity projectSelect the VLTracking GameObject in the hierarchy and drag the license file from the project view in the public License File field in the inspector of the TrackingConfiguration component.
Start button.The example scene lets you select your camera at start.
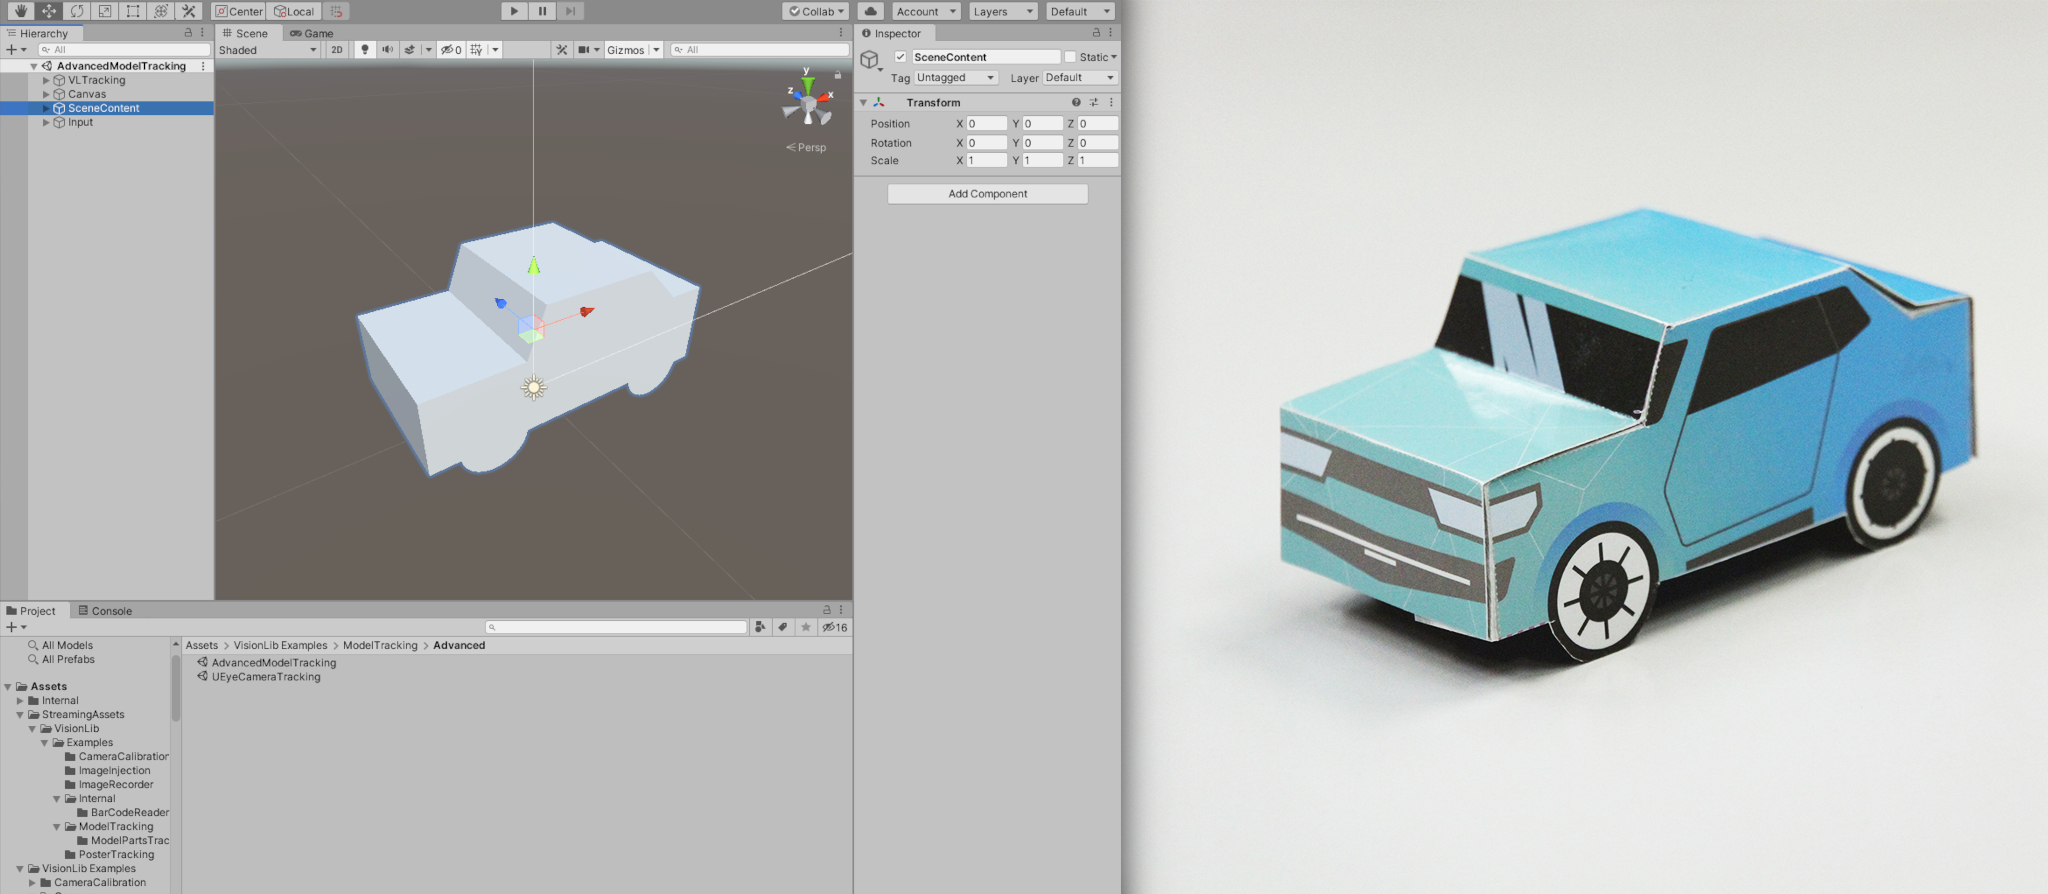
You should see the live camera view and a 3D model of the mini car in Unity's game window now.
If everything worked well, your game view should look like in the picture above.
For demonstration purposes, we merely superimpose the same 3D model that is used for tracking the real mini car in the live image stream. But of course, you can replace this simple augmentation by anything more complex. For this you can exploit the full range of features that Unity offers to you. In contrast to other tracking techniques, model tracking will always use the physical 3D model as a reference. As an advantage, all augmentations will appear right in place as soon as the real object is recognized and tracked in the images, because the coordinate systems of the tracking system and the created virtual content are aligned automatically.
Controlling and customizing the tracking can be done via tracking configurations. Within these JSON-formatted files, you can change tracking targets, fine-tune the tracking parameters, or specify camera or image stream inputs. There exists a pre-configured file for this quick-start demo, which you can use as a starting-point and adapt it to your needs.
For changing the 3D model you can do the following.
In order to track another model, you need:
In our case, we replace the mini car with a sports car model. To do so:
Models folder of your project; we will use this for superimposition.Tutorial folder in StreamingAssets/VisionLib folder; this is used for tracking.From the StreamingAssets/VisionLib/Examples/ModelTracking folder, find the SimpleModelTrackingConfiguration.vl file, create a copy, rename it (e.g. to MyModelTrackingConfiguration.vl) and also move it to the Tutorial folder that you created above. This is the tracking configuration file, which is in JSON format. Please open the file in a text editor and review it there.
tracker section, look for modelURI and change VLMiniCar.obj (which is the mini car's 3D model) to SportsCar.obj (which is the reference to the new tracking model we've copied into the folder).Please note the metric parameter. Here, you should define in which scale your 3D model was created. In our case both, the mini car model and the new sports car, are modeled in m. Change this to mm or cm, if your metrics differ.
VLTracking GameObject and change the tracking configuration reference to your new file (e.g. MyModelTrackingConfiguration.vl).We don't want to use the old model for visualization, but the new one instead. To do so, we need to add it to the scene.
SceneContent, disable the VLMiniCar model.Models folder.SportsCar.obj asset.VLInitCamera prefab under VLTracking in the hierarchy.This camera defines the model's initial pose that you could see, once the Start button was pressed. Right now, the camera is set nicely for the old mini car model. We need to change this pose, in order to fit the new model. With the camera selected, move it until you get a nice sight on the new model (have a look at the camera preview window in the image above). This position defines where your tracking — and respectively your users later on — should start working with the augmented reality.
Note: Instead of setting the transform of the VLInitCamera directly, you can also adjust the scene view until you have the desired initial view to your object, select the VLInitCamera and hit GameObject > Align with view. You might also need to adjust the near/far clipping planes of the camera.
Start button and select a camera. The new model should now be rendered as you've defined its init pose via the VLInitCamera.In order to understand what VisionLib's computer vision engine is doing, have a look to the AdvancedModelTracking example and press the Debug on button. You will now see a grey-scale image with 'jaggy' lines, representing the ongoing 3D model's edge detection. Additionally, some statistics are printed regarding tracking parameters that are defined in the tracking configuration.
Hey, hey! You just tested VisionLib's 3D model tracking and exchanged the demo model.
If this does not work with your model, we recommend reading through the following sections in order to set the parameters right for your tracking case.
Perhaps you might have noticed a warning, stating that your camera has not been calibrated. This is a crucial task, which improves the tracking experience a lot. So for the next step we do recommend calibrating your camera. Therefore, follow this tutorial: Camera Calibration.
If you want to dive a bit deeper in how to configure the model tracker, we recommend reading the detailed vlUnitySDK_modelTrackerTutorial, which shows you how to set up a scene from scratch. It also explains VisionLib's prefabs, debug options, and how to work with coordinate systems for VisionLib and Unity in detail.